Friday, August 16, 2013

Otakon 2013

Woooooaaaaah I haven't posted since March?!! Sorry about that... summer's been pretty crazy but it looks like now I have a little more time to organize my braaaaains. Anyway I went to Anime Boston back in May. That was pretty fun. First con I've sold my art at. I have some pictures from that on my relatively new Facebook fanpage.

In any case I recently came back from Otakon in Baltimore. It was pretty fun, albeit a little on the crazy side. This was the most packed I've ever seen the convention center, what with it being the 20th anniversary and all that. There were some things I really wanted to see but missed out on, like getting an autograph from my favorite animation director, Shinchiro Watanabe, after waiting in an autograph line for 2 hours. But I did get to see TMRevolution and the simulcast of Yoko Kanno's performance which were both pretty high on my list. As well as eating crab. That's always a must when going to Baltimore. In any case, I'll just leave some pictures here. Although I've been working on cosplay stuff through the summer, I'm a little behind in posting my progress here, and it looks like I never got around to posting my full Stormcloak photoshoot! I'll have to do that soon.


First off, this was clearly a pink ranger cosplayer I saw while on the first part of my journey to Baltimore.


Ate at a really great Korean BBQ in Boston the night before flyin down to Baltimore. I thought the menu graphic was fun.


I've always loved this ship.


On Thursday my friends went into the pre-reg line around mid afternoon to pick up badges and waited for hours. I opted to stay in the hotel room to finish up some last minute work on my costumes. I finally got into the line at about 9pm and only had to wait about 10 minutes. Mwahahaha.


Whenever I get a new wig head, I usually like to draw some sort of face on it, but I've had this guy for a while and never got around to it. So my friends decided to draw on the kuso miso face...


Afterwards I got around to starting my wig for Vyse. At the time, the only wig I was able to find in the right color was very long so I had quite a bit to chop off. Makes for a great mustache, donchathink?


First up on Friday, there was some weird red carpet walkway/awkward outdoor photobooth thing that Otakon/the city of Baltimore was doing?? They wrangled me up for this. I got some printed stickers to boot.


I've been a big fan of Fire Emblem since the franchise came to America so seeing the Awakening version of Ephraim was pretty awesome.


Brewster from Animal Crossing


This guy's hilarious. He came up to me on his own initiative to get a picture with me. It's just a coincidence we happened to both be cosplaying characters with the same color hair. But I immediately remembered him from last year as the Machoke cosplayer. I've got a picture of him from last year...


See? Freakin hilarious. And this guy laughs like non stop.


Ephraim again, this time with a Great Lord Lucina. Really great looking costumes.


Giga Pudding!


This was my Saturday costume, Vyse from Skies of Arcadia! I have a bit of touch up work to do and have to finish the cutlasses before I can do a proper photoshoot, but it was a good first run and I was surprised by the number of people who stopped me for pictures and knew who I was!


My annual visit to Edo Sushi in the mall near the convention center involves drawing faces on the drinks menu placemat.


Metal Sonic!
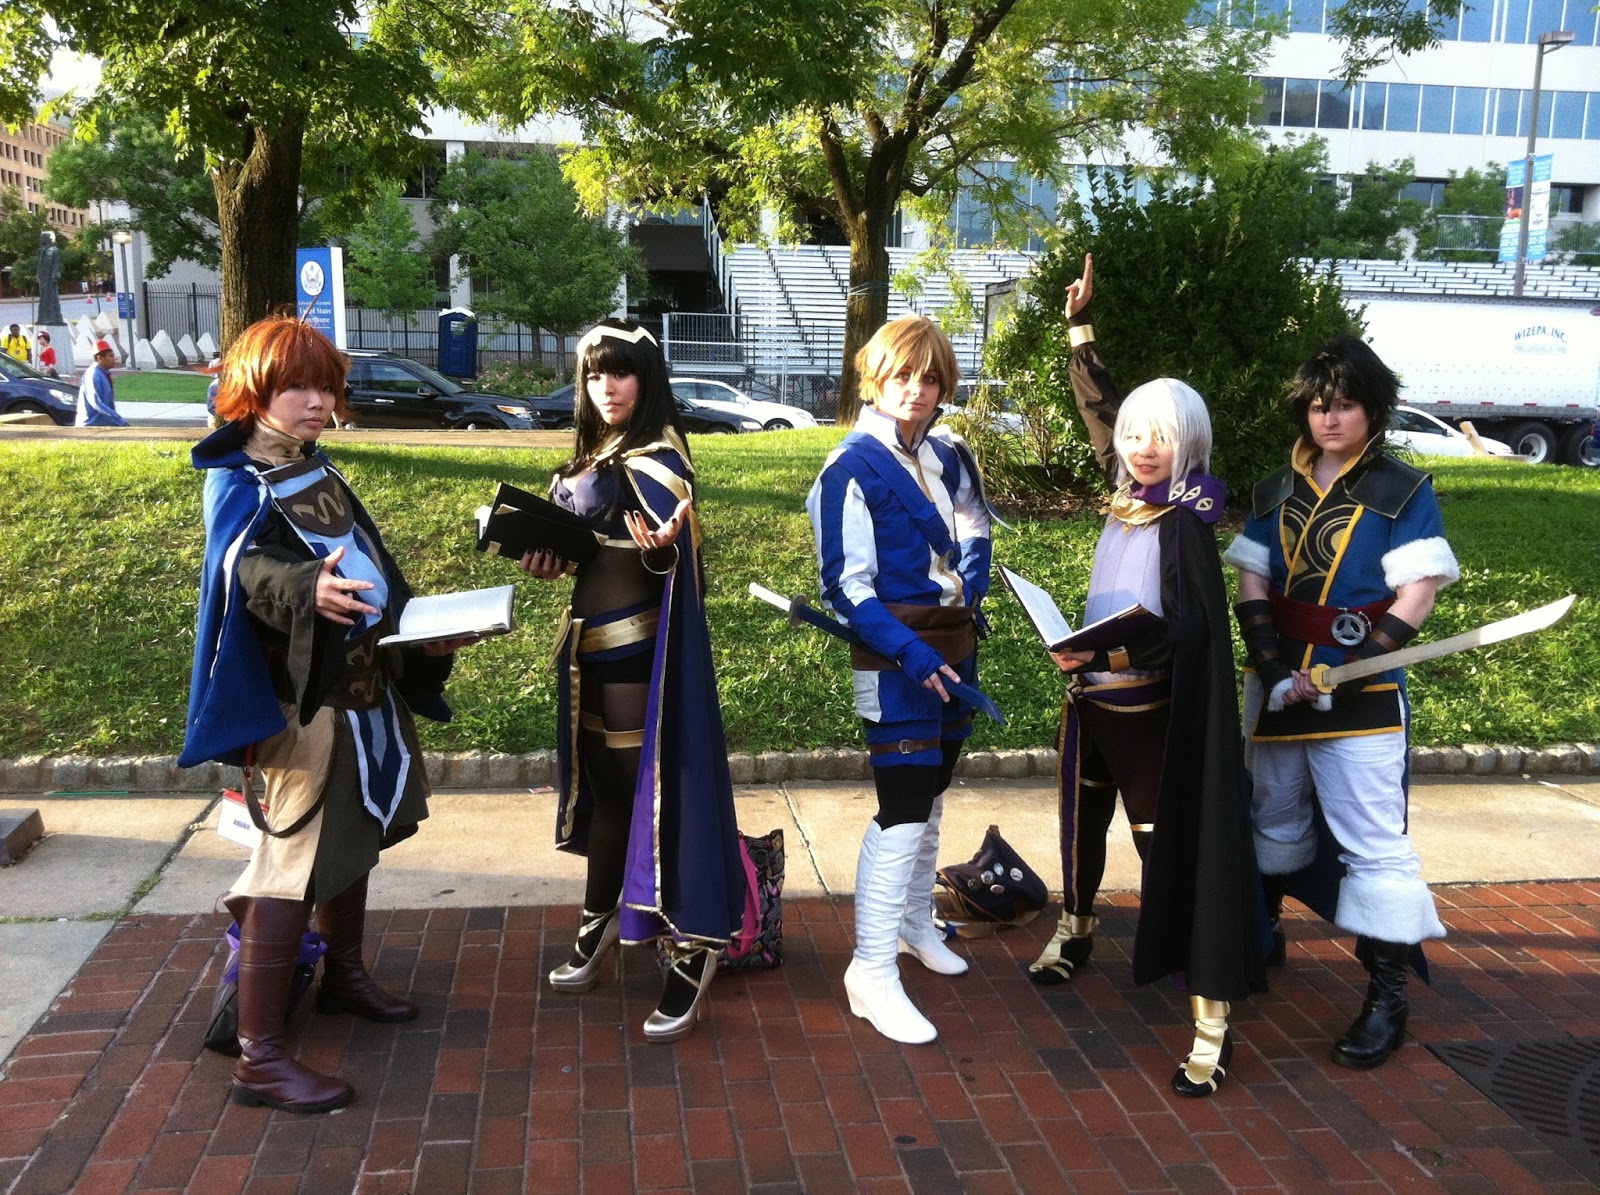

More Fire Emblem cosplayers! They looked absolutely ravishing. Especially Tharja (she's my wifey in the game ;D)


Fun Gyarados and Harley Quinn


Sheik and Nabooru


Pretty sweet daedric armor from Skyrim


Life-size working and sound-making R2D2! I wonder how much that cost...


Although it's usually a bit pricey, I always try to make a point of having crab while in Baltimore. Cuz it's just too damn good. This time I got a soft-shell crab sandwich. 


My final picture, probably the cutest Kiki I've ever seen! This is just as we were leaving our hotel.

Anyway, I had a really great time but as usual it was a whirlwind up to and through the convention so I'm happy to be taking it a little slower now. But pretty soon I'm gonna get back on finishing up some costumes I'm working on (Vyse included), and got quite a bit of artwork to finish as I have 3 cons coming up this Fall that I'm selling at! Hope you enjoyed the pics and please look forward to more posts in the coming months.


Saturday, March 23, 2013

Stormcloak Soldier Full Body


I'm working on editing my photoshoot for this costume as well as a ton of illustrative work, so in the meantime, here's me wearing the full, finished costume!

I also made a cosplay.com profile for this costume.

Sunday, March 17, 2013

Stormcloak Armor

 Finally, the Stormcloak armor.


Again, since the toning in Skyrim is desaturated, I used a more vibrant cloth than you see in the reference. The jerkin is made from faux leather as are all the belts and pouch. The chainmail parts are just sleeves that are linked across the chest and back, since you only really see the chainmail on the arms anyway. I sewed some leather cord around the arm holes. The blue scarf/sash is a bit tricky to wear because it doesn't want to stay in position too much. I'll probably put in some safety pins when I wear it to a con next.


The gloves are very comfortable. They take a while to get on though, what with the belts. I put everything together except for the gloves which were bought.


The boots are really nice. Really warm too! I used some general purpose cosplay boots as a base and then built the rest around them. The shoe part is suede sewn with leather cord, and the padding is craft foam covered in faux leather.


Here you can see how the jerkin started out. It's lined with wool which was especially nice for my winter photoshoot. 


The pattern on the sash was done in one layer of fabric paint using a stencil.


All done! But doesn't look like it's seen years of wear so...


I used scissors and sandpaper to weather it.


Here's the two finished sleeves.


The fur was actually made from thin fur ribbon strips that they sold in a roll at Jo-Ann's, so I had to sew them together to make bigger pieces, like those seen all the way around the boots.

My next post should be pics from the shoot!


Wednesday, March 13, 2013

Iron War Axe


Very excited to show you my work on the axe for my Stormcloak costume. It was tough to decide specifically what weapon to make from the game. Since it was to accompany my shield, two-handed weapons were out of the question. The concept art for the costume depicts the Stormcloak with a sword, but I really felt an axe better fit a Nord and Nord culture, as well as the traveling Stormcloak soldier. It's got that nice hammered texture and looks like it was made quickly for outfitting a soldier, which I liked.


Here's the finished project. The handle is made of wood, but the axe head is fiberglass over foam using the same process as my shield.


I found a nice branch in my backyard that had the correct shape needed. I sawed off the ends and sawed/sanded off the bark as it was very loose and wouldn't be good for the finished prop as it was.


I continued to sand it to fit some PVC which would be used as the cap for the axe.


Since the branch had fallen off a tree some time ago, I wanted to strengthen it to make sure it could take a bit of abuse as a prop (not that I'd be really hitting things with it :P). So I used wood hardener along the entire length.


I made some approximate measurements from the in-game render to draw out the shape of the axe head on foam.


Here you can see some of the sanding process.


I used an exacto to carve out the edges. I didn't focus on any of the texture yet, just creating the base shape to work from. I sanded the interior edge of both pieces to allow them to fit the PVC.


Like the shield, the foam here was covered in 3 layers of masking tape to protect it from the resin.


After applying the fiberglass with an extra layer of resin to work into, I used my trusty dremel to create that hammered texture. I also used the dremel to carve into the handle to regain that barky texture, and used a dark ebony wood stain to match the hue seen in the reference. I glued the handle on with hot glue, which I also used to seal off the top. It was painted with chrome spray paint, semigloss clear, and a bit of black and burnt sienna acrylic for the rust and weathering. The final step was sewing on the faux leather grip to the handle.

I'm very happy with the finished product. I only kinda wish it really was made of metal so it would make a cool clanking sound when I hit my shield with it!

Monday, March 11, 2013

Windhelm Shield


For my Stormcloak costume, I really wanted to make this shield. I love all the shields that represent the different holds, with their different colors and emblems. A lot of the Stormcloaks that go to war actually use hide shields and the like, since this is more of a guard's shield. But I couldn't pass this up, I love the bear design. Plus, it's the symbol of not just Windhelm, but the Stormcloaks as well. And when I get around to making the guard's helmet, I can go around as either a guard or a soldier.


So here's the finished piece. It's all fiberglassed over, and carved to look like wood; it isn't actually made of wood. That keeps it nice a light. I used a more brilliant blue than in the reference because the in-game graphics have more desaturated and blue overtones to set the mood of the game, which I can replicate in my photoshoot.


The back of the shield, painted to look like wood, with a comfortable leather handle cover, made from the same faux leather I used for the rest of the costume.


And here's a closer detail shot.

Alright, onto how I made it!


 Here's my friendly materials. The base was made of a single 1/2" thick piece of insulation foam, about 20" in diameter. There's 2 cardboard rings at the same size, width being 1". Finally a strip of thicker cardboard to go all the way around the edge which is about 3/4" wide. I glued these all together.


After that, I used 3 layers of masking tape all the way around to properly seal off the foam and protect it from the resin. You can also see the axe in this pic; I'll talk about that in the next post.


Here's the shield and axe fiberglassed over. I followed up with a layer of plain resin so I would have a surface to sand and carve into without ripping up the fiberglass cloth.


Since I only had 1/2" thick insulation foam, I glued two pieces together for the handle. I traced out the shape I needed, about 10" long, then cut it out and carved/sanded it into shape. Again, wrapped the whole thing in 3 layers of masking tape.


I stuck the handle on directly using fiberglass resin, and made sure there was enough covering over it in order to keep it strong.


Unfortunately I'm missing a few photos here - from the carving process, but I think it comes out more clearly when painted anyway. Using a dremel, I carved into the body to give it a wood texture as best I could. I used more rounded bits to carve into the rim to give it the hammered looking texture, as if the metal rim had literally been pounded at a forge. My little dremel had a lot of trouble getting through so much resin that I only got about 20 min. tops out of the battery before I had to recharge it again. I probably wore down the battery a lot on the project ^^;. But this process literally took a few months of work off and on. Once the shield was cleaned, I primed it all the way around with gray primer. Then I used a dark gray automobile spray paint with an extra bit of chrome shimmer for the metal, covered by a layer of semi-gloss clear to seal it (used on the handle too). Then a base layer of black acrylic on the wood, both sides.


With the black layer in place, I built up the brown wood tones. The black underneath was used to accentuate shadows. I mixed several different browns to build up the wood, using a cut piece of firewood I had for reference.


On the front of the shield I painted the browns all the way across, even though a lot of the front is blue. The reason is, since this is supposed to be a guard's shield, it would probably be made as quickly as possible. The blacksmith wouldn't take quite as long on something like this as he might the Jarl's own shield. So this means the painting job would be a little more crude, as evidenced by my reference image at the top of this post. If that's the case, you're likely to see bits of the wood underneath the blue paint too, so that's why it needed that base layer of brown right the way across. Admittedly though, since I knew mostly of it would be covered up, I painted it a bit more quickly in a solid color, somewhat transparently.


In Photoshop, I took the shield reference and blew up the bear design to the approximate size I felt it needed to be for the shield (15.5"x12"), and cleaned it up a bit. I printed it out onto a few pieces of paper, taped them together, then used stencil film on top to cut the design out. Once ready, I taped it onto the shield and painted it.


The final step was to spray some workable fixative on the front to protect the paint job, and sew on the leather handle. And that's about it! It took a while but I really enjoyed the process, and even though using real wood may have been easier so I could skip that whole long ass carving step, the shield benefits from being very lightweight yet still durable. Looking forward to doing more props like this in the future!